Bob_Kennedy

Joined: Feb 27, 2012
Posts: 316
Mesa, AZ.

|

Posted on Mar 12 2012 02:42 AM
Well first off, I'd like to say hi to everyone here at SG101. This is my first post. I built a 6G15 clone back in Dec. & I thought I'd share it here. I originally posted this thread on TDPRI, so I apologize to any TDPRI members who may have seen this the first time. Here we go...
So, my dad gave me his '65 Showman back in November. I love it. It's an amazing amp. However, I needed reverb & no reverb pedal could ever do this amp justice. I've always loved & played surf music so it was time for an outboard reverb unit. I don't have the scratch for a Fender reverb, so I decided to try my hand at building my own. I should mention that I have zero experience working on tube amps. I re-capped the Showman 2 days before I started this project. It went very well. So did the reverb unit. I used the Triode Electronics kit & was very pleased with the quality of the components supplied with the kit. It took me about 16 hours total, building the cab & all......
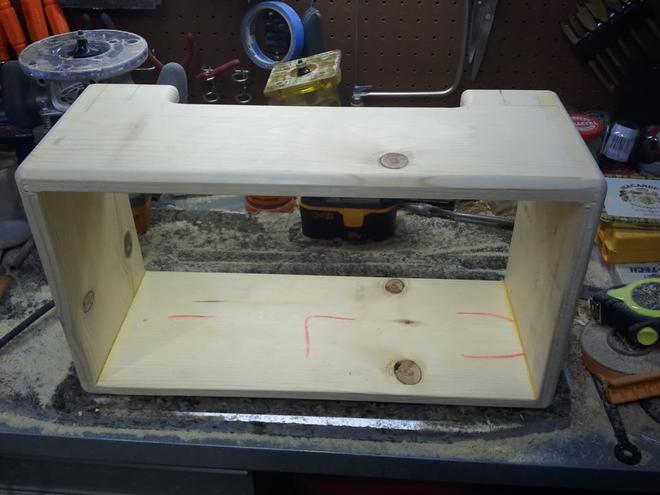
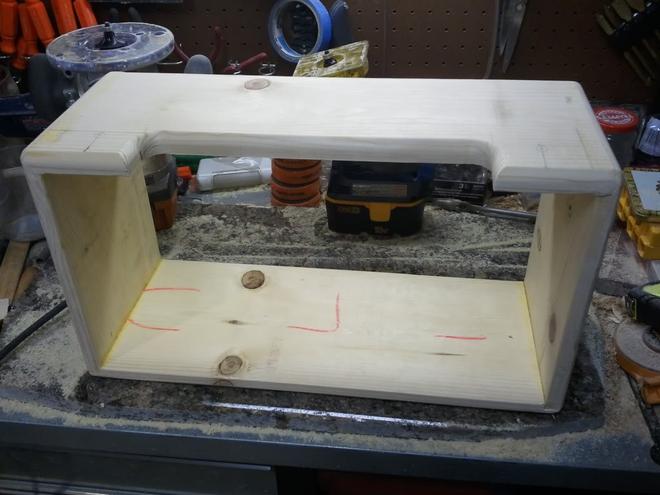
I built the cab out of 3/4" pine. Nothing special. I got the dimensions from the Fender website...
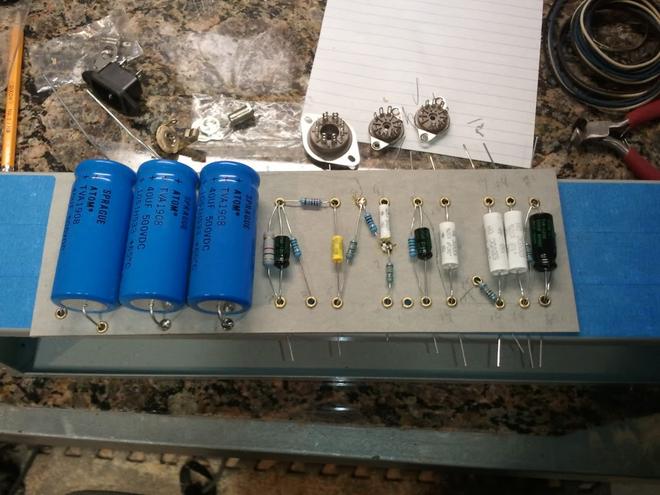
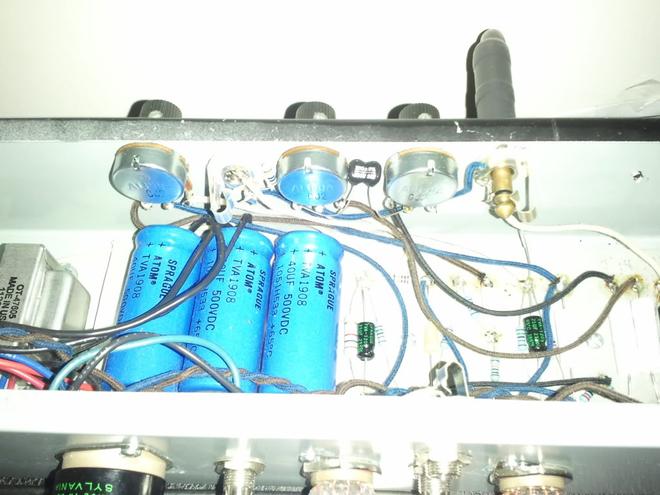
I got some fiberboard & eyelets from Antique Electronic Supply here in town & kinda winged it on the layout. It worked just fine...
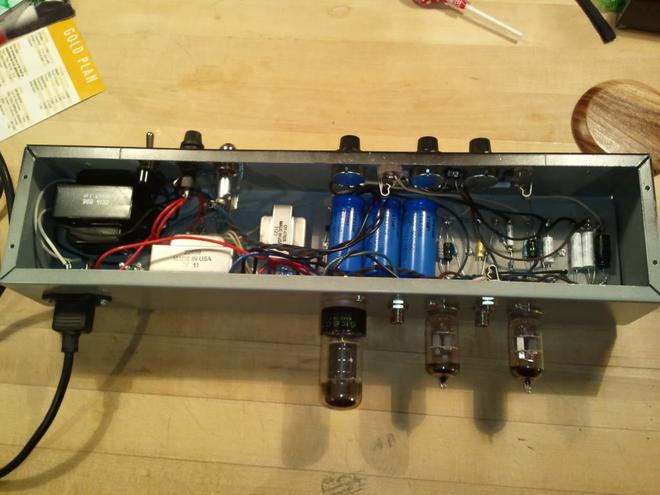
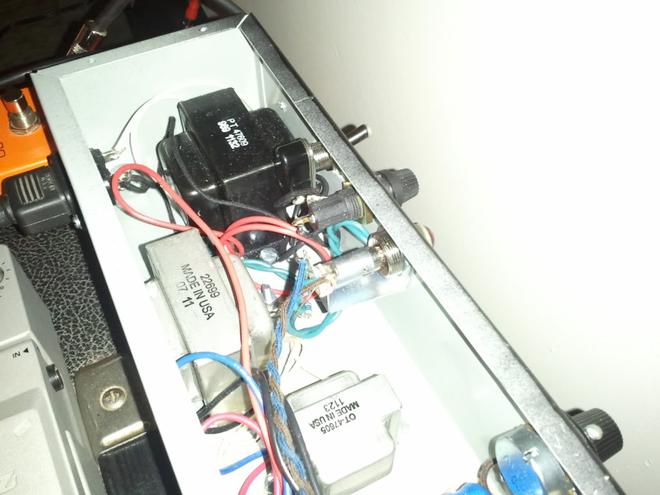
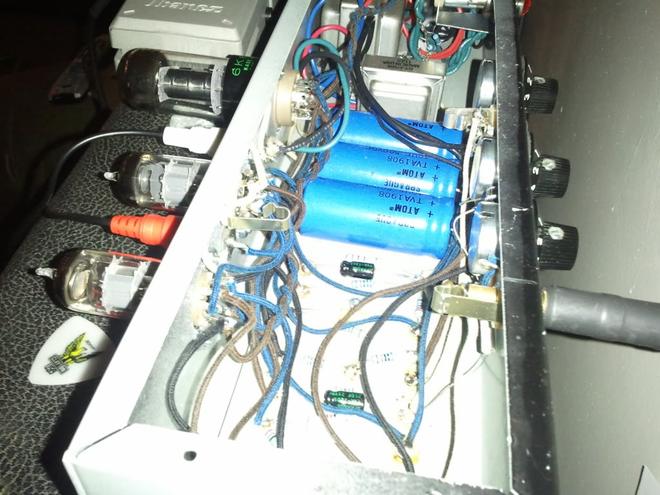
I used a blank Hammond chassis from AES. It's got enough room to mount everything inside. I suppose the wiring could be a little neater, but it works & is safe. Cutting all the holes in the chassis was the hardest part of the build for me.....
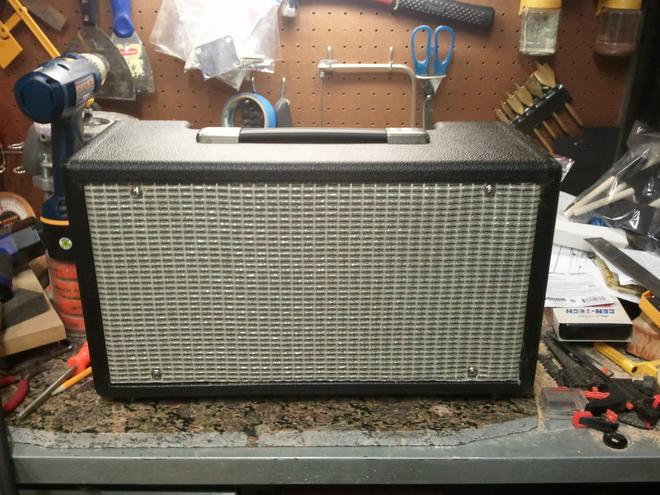
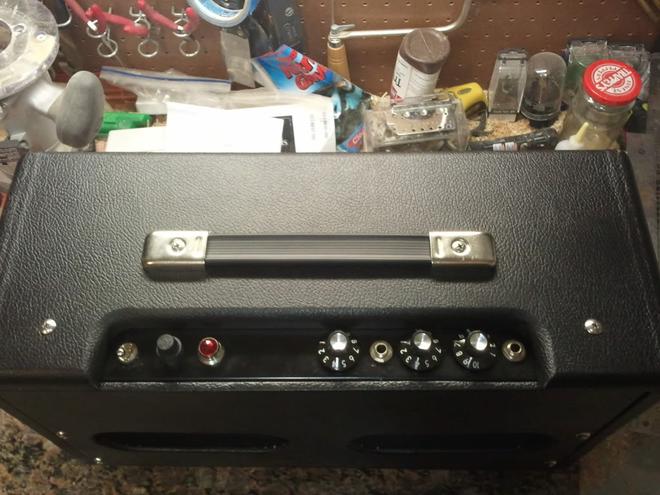
Got some black tolex & a blackface handle from AES. I wanted it to match my Showman as close as possible....
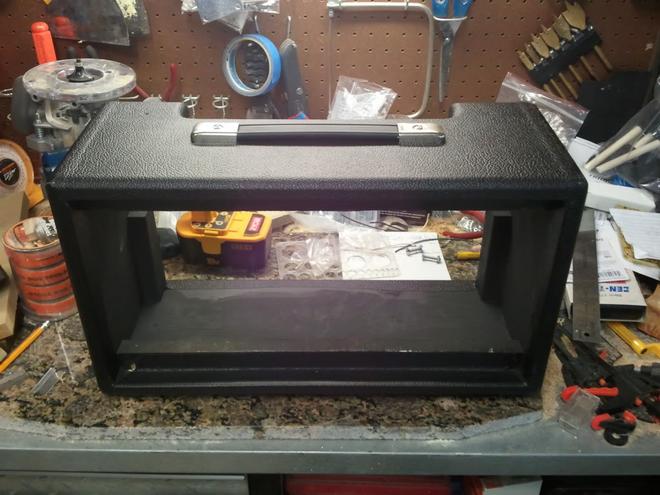
Got some "aged" blackface grille clothe from Mojo. Man, that stuff's a pain to work with!....
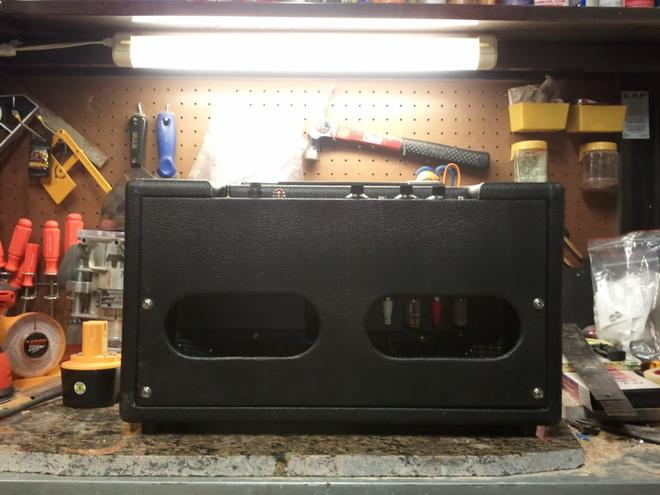
The view from the back & the top....
I used a MOD reverb pan & hard mounted it to the front panel. It was a fun project & I'm very pleased with the end result. I've got more than enough reverb now. Full on surf city! I followed the Triode schematic to a tee & it's worked perfectly from the first time I switched it on. Maybe I just got lucky!
Bob
— Otto & The Ottomans
Kennedy Custom Guitars
|
tubeswell

Joined: Sep 24, 2011
Posts: 1424
Wellington, NZ


|
Posted on Mar 12 2012 03:45 AM
Lovely job for a 1st build! (And well done on the bonus nil-troubleshoot!)
— He who dies with the most tubes... wins
Surf Daddies
Last edited: Mar 12, 2012 03:45:16
|
vintagesurfdude

Joined: Nov 28, 2011
Posts: 795
Prescott Valley, AZ
|
Posted on Mar 12 2012 09:05 AM
Very nicely done! AND it works ! 
Thanks for posting !
|
peterbright

Joined: Feb 10, 2012
Posts: 233
Near the Swamp In Louisiana
|
Posted on Mar 12 2012 09:40 AM
|
cambeezy

Joined: Jun 26, 2007
Posts: 399
Cleveland, Ohio
|
Posted on Mar 12 2012 10:01 AM
Hi Bob, welcome to the 101. Congrats on the build! I luv the witch hats. Those Atom caps are fun to shoe-horn in, aren't they?
|
jbennett

Joined: Mar 29, 2011
Posts: 110
Brooklyn, New York
|
Posted on Mar 12 2012 01:03 PM
Really nice work. I just finished my first too. I'm afraid I've got the amp building bug.
I agree, aside from learning the basics (thanks again Tubeswell!) the drilling of the chassis was the biggest challenge. And that wasn't so bad.
Great job on the cab/tolex.
Last edited: Mar 12, 2012 13:04:58
|
Bob_Kennedy
Joined: Feb 27, 2012
Posts: 316
Mesa, AZ.
|
Posted on Mar 12 2012 01:13 PM
Thanks for the warm welcome guys. This was a fun project, but I have no desire to continue amp building. As long as I am able to maintain & repair my own amps, I'll be happy.
Oh yeah, jbennett, I've been following your reverb unit re-do on TDPRI. Now that is some clean work!
— Otto & The Ottomans
Kennedy Custom Guitars
|
Louie7

Joined: Jan 30, 2007
Posts: 448
50,000 Light-Years Beyond Planet Claire
|
Posted on Mar 12 2012 03:02 PM
Well, Aye 4 Won.... wood like to see pix of the whole encheelada, including the 65 Showman amp and the gitarr.
|
Bob_Kennedy
Joined: Feb 27, 2012
Posts: 316
Mesa, AZ.
|
Posted on Mar 12 2012 04:05 PM
Louie7 wrote:
Well, Aye 4 Won.... wood like to see pix of the whole encheelada, including the 65 Showman amp and the gitarr.
Here ya go...
http://surfguitar101.com/forums/topic/17714/?page=2
— Otto & The Ottomans
Kennedy Custom Guitars
Last edited: Mar 12, 2012 16:07:08
|
LeeVanCleef

Joined: Oct 05, 2011
Posts: 744
France

|
Posted on Mar 13 2012 10:36 AM
Well congratulations, that's a very nice-looking tank. 
So it's really that easy? I've DIYed a few pedals so far, but I'm mortally afraid to try my hand at high voltage stuff. 
— Old punks never die... They just become surf rockers.
|
Bob_Kennedy
Joined: Feb 27, 2012
Posts: 316
Mesa, AZ.
|
Posted on Mar 13 2012 01:08 PM
LeeVanCleef wrote:
Well congratulations, that's a very nice-looking tank.
So it's really that easy? I've DIYed a few pedals so far, but I'm mortally afraid to try my hand at high voltage stuff.
Yes, for me it really was kinda easy. However, I'm a measure twice & cut once kinda guy. Before I soldered it all up, I triple checked everything against the schematic. Also, to me, the Triode Electronics schematic was much easier for me to understand than the Weber schematic. I'll be the first to admit that I don't really know how to read wiring schematics, but something about the Triode schematic just clicked.
I'd say give it a go! Especially if you've built a few pedals. Just keep double checking everything as you go. Pay attention to the grounds. I used a couple of star grounds & luckily the unit ended up pretty quiet right from the start. Beginners luck, I guess!
— Otto & The Ottomans
Kennedy Custom Guitars
|
jbennett
Joined: Mar 29, 2011
Posts: 110
Brooklyn, New York
|
Posted on Mar 13 2012 03:51 PM
LVC...
It really is fairly easy. I'd never read a schematic in my life either.
To me, the biggest help was laying the schematic next to the amp layout and learning to trace the signal between both views.
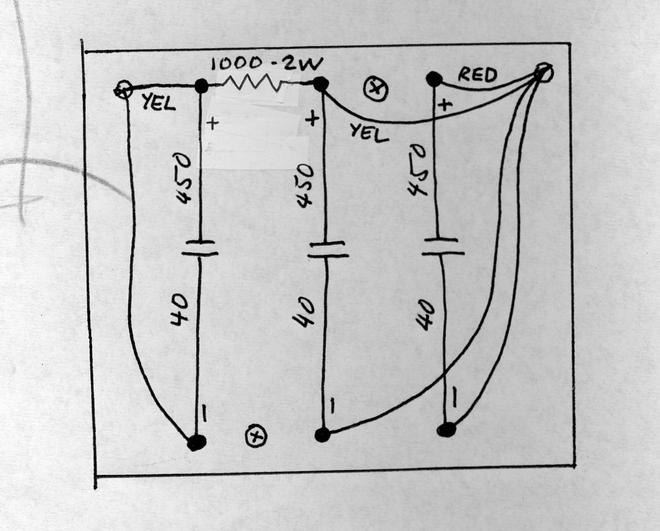
image

Note: the layout does not show the electrolytic capacitors (not sure why) Here is my drawing of that hidden section...
Last edited: Mar 13, 2012 15:52:59
|
LeeVanCleef
Joined: Oct 05, 2011
Posts: 744
France
|
Posted on Mar 14 2012 08:50 AM
Thanks for your words of encouragement guys but I really don't feel up to it at this point. I can read schematics and I've developed decent layout-designing skills with regard to stompbox electronics, but high voltage stuff is a completely different matter with pretty different rules, isn't it? And I'm afraid I lack some basic knowledge there.
Still, at about 750 euros ($980) for a RI tank in these parts, I hope I can improve my DIY skills in the near future, especially if I can get as nice a result as either of you.
— Old punks never die... They just become surf rockers.
|
jbennett
Joined: Mar 29, 2011
Posts: 110
Brooklyn, New York
|
Posted on Mar 14 2012 12:49 PM
Yeah. It can be dangerous. BUT, if you follow the rules and learn how to stay away from high voltage stuff. The main rule I followed was... turn off the amp, let it discharge and unplug it, and use a meter to verify that the power is drained whenever I did anything inside the chassis.
If you want to get into it I suggest watching some videos of amp techs at work, read a few basic electronics books, and talk to someone who knows there stuff.
A little knowledge goes a long way and the danger gets demystified with an understanding of the hazards. Either way it is smart of you to NOT dive into it as a beginner. That said, you can assemble most of the guts of the reverb without ever having any electricity anywhere near you. Besides a soldering iron.
Last edited: Mar 14, 2012 12:51:04
|
vintagesurfdude
Joined: Nov 28, 2011
Posts: 795
Prescott Valley, AZ
|
Posted on Mar 14 2012 03:50 PM
To be safe, after turning off and unplugging the unit to be tested, always discharge the filter caps. I use a long screwdriver with a lead attached to the shaft that ends with an alligator clip. Clip to the chassis and short the capacitor lead which is furthest from ground. You can get sparks and you should short it multiple times to insure that the cap is fully discharged. A safer method is to build a gadget from an alligator clip, a short piece of wire, a 1K or so resistor and a meter probe. The resistor will reduce the likelihood of a spark and drain the cap slowly. So you need to keep the lead attached for a little while. I use the screwdriver method because the handle is well insulated and I've never blown anything up doing it this way for over 40 years. But always be careful and never poke around inside a chassis with both hands. While probing or testing inside a live chassis, always use one hand and put the other in your back pocket. You may still get zapped, but it won't kill you. Electricity takes the path of least resistance, so if you have one hand on the chassis and get hit on the other, it can go straight through your heart. Not too good.
|
tubeswell
Joined: Sep 24, 2011
Posts: 1424
Wellington, NZ
|
Posted on Mar 18 2012 05:21 AM
FWIW it pays to install a permanent 2W 220k-470k bleeder resistor in parallel with the first (reservoir) filter cap so the discharge happens automatically every time. (You should still check the discharged caps with your V-meter before you work on it tho - good habit)
— He who dies with the most tubes... wins
Surf Daddies
|


