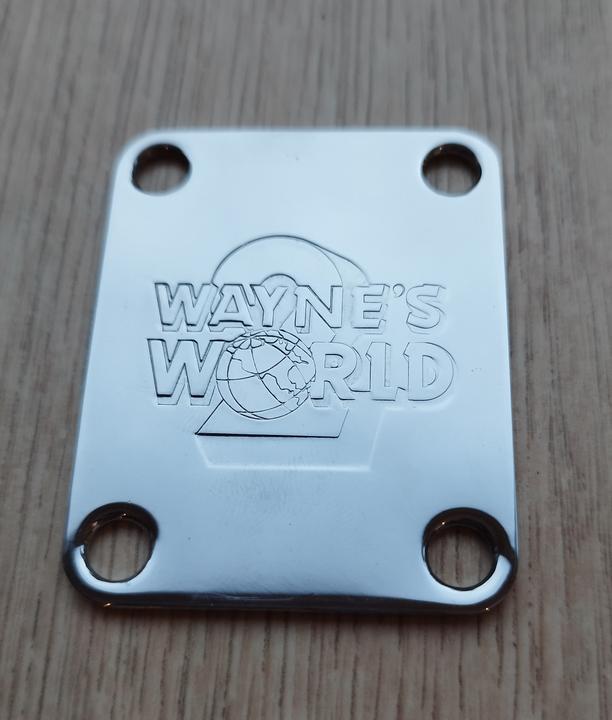
Thank you Edward.
I found this excellent neck plate online. Party on!

Last edited: Oct 12, 2023 10:21:38
dp:
dude
349 days ago
Bango_Rilla:
Shout Bananas!!
304 days ago
BillyBlastOff:
See you kiddies at the Convention!
288 days ago
GDW:
showman
239 days ago
Emilien03:
https://losg...
161 days ago
Pyronauts:
Happy Tanks-Kicking!!!
155 days ago
glennmagi:
CLAM SHACK guitar
140 days ago
Hothorseraddish:
surf music is amazing
120 days ago
dp:
get reverberated!
71 days ago
Clint:
“A Day at the Beach” podcast #237 is TWO HOURS of NEW surf music releases. https://link...
4 days ago
No polls at this time. Check out our past polls.
No contests at this time. Check out our past contests.

|
Joined: Mar 11, 2023 Posts: 163 
|
Thank you Edward. I found this excellent neck plate online. Party on! Last edited: Oct 12, 2023 10:21:38 |
|
Joined: Mar 11, 2023 Posts: 163 
|
Oops. Last edited: Oct 12, 2023 10:21:19 |
|
Joined: Mar 11, 2023 Posts: 163 
|
Changed the string trees to Fender Vintera ones. They look nice. Also fine tuned the neck by taking a little bit of material off the shoulder, bass side between the 1st and 3d fret.
Last edited: Dec 03, 2023 06:00:29 |
|
Joined: Mar 11, 2023 Posts: 163 
|
I have been playing this JM almost daily (and exclusively). But I was still bummed out because of the less than great application of clearcoat, particularly on the back. So I pulled it apart and sanded the body with 400 grit, put on a coat of primer and sanded that with 800 and 1000 grit. I also softened a few curves and removed any trace of the round-over router bit which I thought looked nice at first). Also filled a few dings. Then I dropped the body of at an automotive repair / body shop. My friend works there. He used my left-over rattle can paint to scan the colour (I asked for maximum metallic). They mixed up a batch of modern automotive paint (the water based version) and covered it with a clear coat. A bit of a shame that their system can't deal with the original colour codes from the fifties and sixties that Ford and GM used). One day later I could pick it up. It had a bit of orange peel but my friend told me to not sand or polish it, just give it a few days. And he was right, it disappeared. The paint feels smooth. It's a really thin coat, based on the masked tape I removed. Nothing like the polyester or polyurethane finishes. So I better not throw it around.
Last edited: Apr 14, 2024 08:58:09 |
|
Joined: Mar 11, 2023 Posts: 163 
|
I also fitted a BEAUTIFUL new pickguard from General Vintage Tone. It's a "1963 Vintage Brown Tortoise Nitrate for Jazzmaster®️ Pickguard 4 layer Top real nitrate celluloid". It fits AVRI models. And more importantly, it fits the guitar I made from templates based on a sixties model JM (bought from Guitar and Bass Build (UK). Advertised as real nitrate celluloid, and it did start to cup a bit after laying on my desk for a week. Nicely priced. Seems a good alternative to the (in my mind very expensive) Spitfire guards. One small thing: the tightest curves and points needed a bit of razor blade scraping due to having flat spots / looking too square. I bought it at General Vintage Tone's Reverb store. He was good to deal with and sent it out quickly. The company is based in Spain, EU. General Vintage Tone
Last edited: Apr 14, 2024 09:38:30 |
|
Joined: Feb 02, 2008 Posts: 4549 Not One-Sawn, but Two-Sawn . . . AZ. 


|
DrippyReverbTremolo wrote: — The artist formerly known as: Synchro When Surf Guitar is outlawed only outlaws will play Surf Guitar. |
|
Joined: Feb 28, 2006 Posts: 2384 San Jose, Ca. 


|
Congratulations! Incredible job! Thank you for sharing the whole process. It is quite an amazing achievement. —Bob |
|
Joined: Mar 11, 2023 Posts: 163 
|
Thanks Bob and Synchro! |
|
Joined: Mar 11, 2023 Posts: 163 
|
Apparently, Ice Blue is very close to the Renault color 'blue celeste'. That is what the body shop used. I installed a Staytrem collet and arm on the AVRI vibrato. The arm has a nicer curve and is 2 Cm longer - bonus. But I felt the arm had a bit too much resistance to be able to play while holding the arm. I want it to stay in place and to be able to move it with just a finger. My solution: Last edited: Jun 03, 2024 13:03:29 |
|
Joined: Sep 29, 2015 Posts: 479 |
EPIC work my man. That looks gorgeous. |
|
Joined: Mar 11, 2023 Posts: 163 
|
Pihabeach82 wrote:
Thank you, very kind. Here are two vids I did last year: |