Ben

Joined: Feb 11, 2007
Posts: 591
Encinitas, Ca
|

Posted on Nov 12 2012 04:51 PM
I bought a blown D130F from Matt22 a few months ago. I finally got around to working on it and I thought some of you might be interested in reconing your own speakers. I have had speakers reconed by Orange County Speaker in the past but I thought this would be an interesting project (and I saved quite a few bucks in the process). I found a company called Sound Speaker Repair that makes recone kits for a lot of popular speakers. This kit was $100 and included all the parts needed. The instructions were good and they have an online video that walks you through it. Overall it was a pretty easy job if you're into this sort of thing. I have done some preliminary testing and the speaker sounds really good. So here's the basics:
The old speaker had previously been reconed as a D140 bass speaker. Ahh, good times...the stories that speaker could tell.

The first step is to strip off the old cone and spider and to clean the remaining scraps and glue off of the mounting surfaces. I used acetone, a little wire brush, and some fine sandpaper. Here it is all cleaned up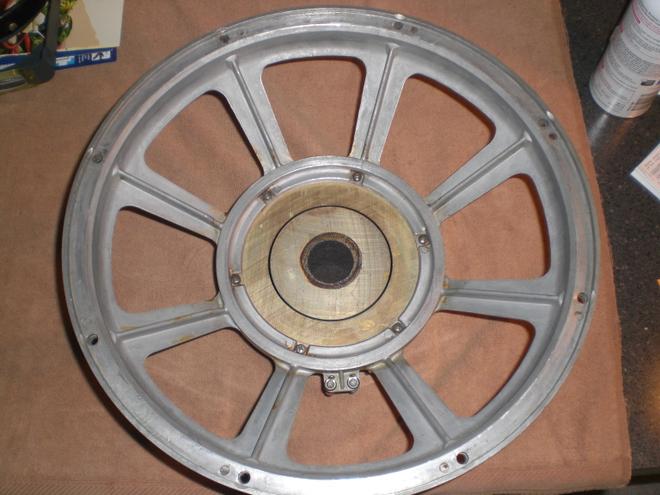
Here is the new cone, voice coil, and spider ready for installation 
The most critical step is centering the whole assembly in the voice coil gap while you are gluing in the spider and cone. The kit comes with these little shims. 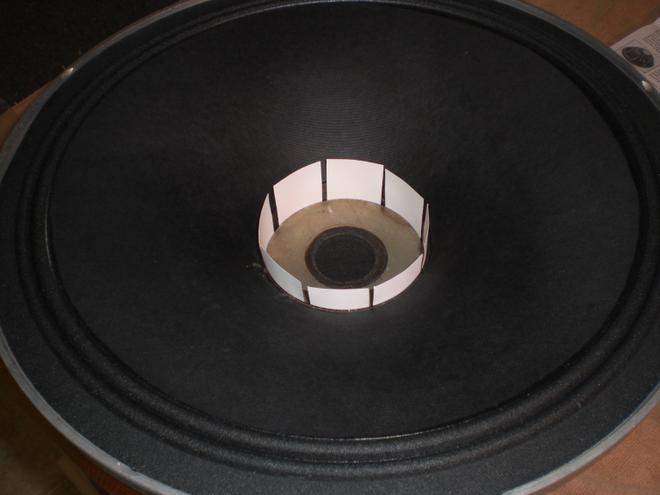
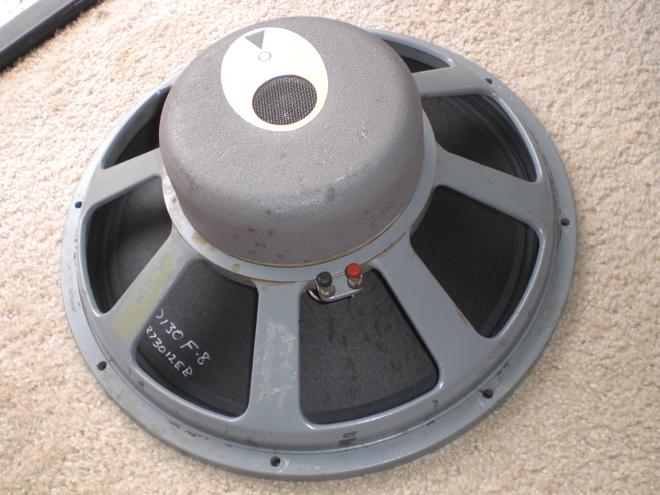
Glue on the new voice coil cover and the cork gaskets and you're ready to rock! image
Last edited: Nov 12, 2012 19:33:46
|
JetBlue

Joined: May 30, 2006
Posts: 746
Cool, CA


|
Posted on Nov 12 2012 06:21 PM
Thanks Ben! I've apparently blown my D130F and am just starting to look at my options. This looks do-able.
Did the kit come with glue?
Any other gotchas besides the voice coil gap?
— Don
|
Sonichris

Joined: Mar 06, 2006
Posts: 1907
Wear gloves - I'm in the Rockies


|
Posted on Nov 12 2012 06:29 PM
I've used these kits in the past. Dead easy to install. I was actually looking at these today, and it looks like they have improved the D130F kit quite a bit to be more vintage correct.
Back when I used them, I didn't have any good original D130F's to compare. Anyone able to confirm that these kits make it sound like an original?
— "You can't tell where you're going if you don't know where you've been"
|
tubeswell

Joined: Sep 24, 2011
Posts: 1424
Wellington, NZ


|
Posted on Nov 13 2012 09:33 AM
Wow! Nice work Ben
— He who dies with the most tubes... wins
Surf Daddies
|
eddiekatcher

Joined: Mar 14, 2006
Posts: 2778
Atlanta, GA


|
Posted on Nov 13 2012 12:21 PM
JBL technical Alert!!!!!!!!!!!!!!!!!!
According to the JBL Factory service center there are two versions of the JBL D series speakers. The earliest ones had voice coil slots that were 0.056" wide. These are the best sounding and most efficient speakers due to the increased gap energy................. However they are the ones most likely to blow with high power amps. The second version had the gap increased to 0.086". This increase in gap allowed for better voice coil cooling and resulted in fewer instances of voice coil overheating, warping and burn out.
If the parts you get are for the 0.086" wide gap, and you try to retro fit them into the tighter gap, they will most likely at some point warp from heat, rub against the magnet structure and when the insulation is gone, bingo dead speaker......again?.
How do you tell for sure? Go to the hardware store and buy a number 54 drill bit. It should slide into the early slot nice and snug. It can be wiggled around in the 0.086" slot. Or just get a numeber 44 which is 0.086. Obviously it will not fit in the 0.056 slot.
Additionlly make sure to clean out the gap using masking tape doubled with both sticky sides out to guarantee that there is no trash lingering inside the gap. If there is and you don't remove it...... you will be pissed. Believe me.
eddie k
— Traditional........speak softly and play through a big blonde amp. Did I mention that I still like big blonde amps?
|
Ben
Joined: Feb 11, 2007
Posts: 591
Encinitas, Ca
|
Posted on Nov 13 2012 01:04 PM
Eddie is right...The wider voice coil gap is one of the main differences between the D130 and the D130F.
And, making sure the voice coil gap is clean is critical. I was careful to cover the gap when removing the speaker parts and old glue. Then I used masking tape like Eddie says and then blew it out with a can of computer cleaning compressed air. Then more tape, then more air, then more tape, etc. The "gap" is actually wider at the bottom than the 0.086 opening that you see...there is a large void space in there.
The kit did come with a tube of the proper glue. I wouldn't say there were any real gotchas to the job. One thing that I did, that wasn't mentioned in the instructions, I used a small, fine, round, file to make two little 1/16" notches in the rim of the voice coil cover where it sits on the wire leads. This allowed the cover to rest flat against the cone when I glued it down.
The tools I used were a utility knife, soldering iron, a toothbrush size brass wire brush, compressed air, acetone, sandpaper, and the small round file.
|
eddiekatcher
Joined: Mar 14, 2006
Posts: 2778
Atlanta, GA
|
Posted on Nov 13 2012 01:25 PM
Great advice Ben on relieving the edge of the aluminum cap!
Speakers..............the weak link.
Ed
— Traditional........speak softly and play through a big blonde amp. Did I mention that I still like big blonde amps?
|


